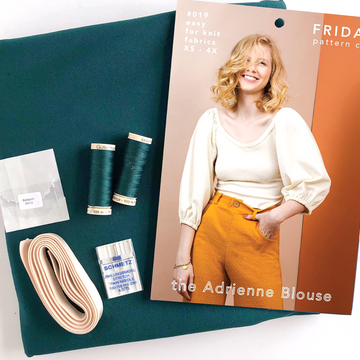
It's now about a week in to the new year, which means that if you've had a resolution, you've either broken it or seriously considered breaking it, but also, that if you got our Wiggle Dress box, you've had time to open it, wash the fabric and get ready to start sewing.
So, now what?
Well, if you're a master sewer, you've probably already got a beautiful dress. But if, like me, you sometimes struggle with certain sewing tasks or you just want a safety net, I'd like to give you some helpful links so you can complete your dress. And even if you're not sewing along with us, these links are good for any sewing really.
Tutorials
First and foremost, if you want a sewalong for your project, both our medium weight and heavyweight boxes have step-by-step tutorials for you. Check them out here:


Specific Sewing Skills
This section is for people who pretty much know what to do. but then hit a step that makes them go "hmm." You know what I mean? It doesn't happen every time I sew, but there's always that weird little bit that makes me pause, whether it's something I haven't done before or something I've just forgotten how to to. Or maybe, I'm in the middle of doing something and I think, "Damn, there ought to be a better way to do this" and then I google it and find out there is!
So, here we go folks, a culling of my favorite tutorials for those fiddly bits of sewing.
Zippers
For the Phoebe dress, you use a centered, regular zipper. The easiest of zipper insertions, depending on who you talk to, it can still seem difficult. So, I've included a tutorial from Colette themselves, which you can find here, as well as one from Megan Nielsen because it find her tutorials to be very easy to follow. And don't forget, we've included some fusible web to stabilize your fabric during zipper insertion.
For those of you sewing either the Loretta Jewel Neck Dress or the Joan Dress, it's invisible zipper time. I actually learned how to sew one of these BEFORE a regular zipper, so I have a personal affection for them. But I do know that most people are not fans. That's why I've included a tutorial from Colette, who, to be honest, has great tutorials all around - very easy to follow - as well as one from Lauren of Lladybird, one of my favorite sewing blogs. Serious, start following her.
Finally, for the lined dresses, one of the bits that I always find fiddly is attaching the lining to the zipper. Some patterns have amazing instructions and some are... a bit lacking. If you need some help, check out these step-by-step guides from the blog, The Girl Inspired as well as one from Craftsy. Take it from me, though, when attaching the lining, make sure it's at least 1/8" away from the zipper teeth or your zipper may get caught and you'll have to cut yourself out of your newly finished dress (and then weep about it for years... alas).

Other Bits
One of the things that not all patterns mention, but that makes a big difference, is understitching. After I discovered how to do it, on my third of fourth project, I was so tempted to go back and redo the old projects. So what is it? It's a line of stitching, sewn to the seam allowance, just inside the edge of a lined or faced edge that keep the edge from rolling. But don't take my word for it! Here are great explanations of the why and how from Colette and Craftsy.
Finally, let's talk sleeves. If you're making the Loretta Jewel-Neck Dress with the sleeves or the Joan Dress, you're going to end up doing one of my least favorite sewing tasks: setting sleeves. I don't know what I'm doing wrong, or even if I'm doing something wrong, but I find the whole sleeve process tedious and difficult. For a while, I almost always had to pick the stitches and try again. That is until I discovered "flat-setting" sleeves, and, let me tell you, it's changed my whole experience. The first thing I do when I get a pattern is adjust it so I don't have to set the sleeves in the round. That being said, I've included tutorials on both. I'm a firm believer is knowing the rules before you break them, so here's the "right way" and the "easy way" to attach sleeves.
The Rest
What I haven't included in this post are flat-pattern adjustments, such as SBAs, FBAs, dart manipulation, etc. While there are a lot of things I could post, it's a bit of a rabbit hole to go into fit that deeply. But I assure you, if you google these, you will find a trove of tips and tricks. Also, if you are making a muslin, and I highly recommend you do if you're new to the pattern, you can usually google your fit problem, like "bust too tight" or "gaping neckline" and find good guides. It really amazing how much the internet has made sewing a more accessible skill!
I hope you find all of these tips helpful. If there are other things you'd like directions on, let me know and I'll include them in future posts.
Happy Sewing!


0 comments